


Fluted Wall Panels
Fluted Wall Panels
Up to 70% Off Sale
Ends In:
Loading...
Regular price
£54.99
Regular price
£99.99
Sale price
£54.99
Unit price
per
Couldn't load pickup availability
Key Panel Features:
- Made-to-order in the UK 🇬🇧
- Ready to prime & paint
- Moisture resistant
- Cut to Size available
- Easy installation
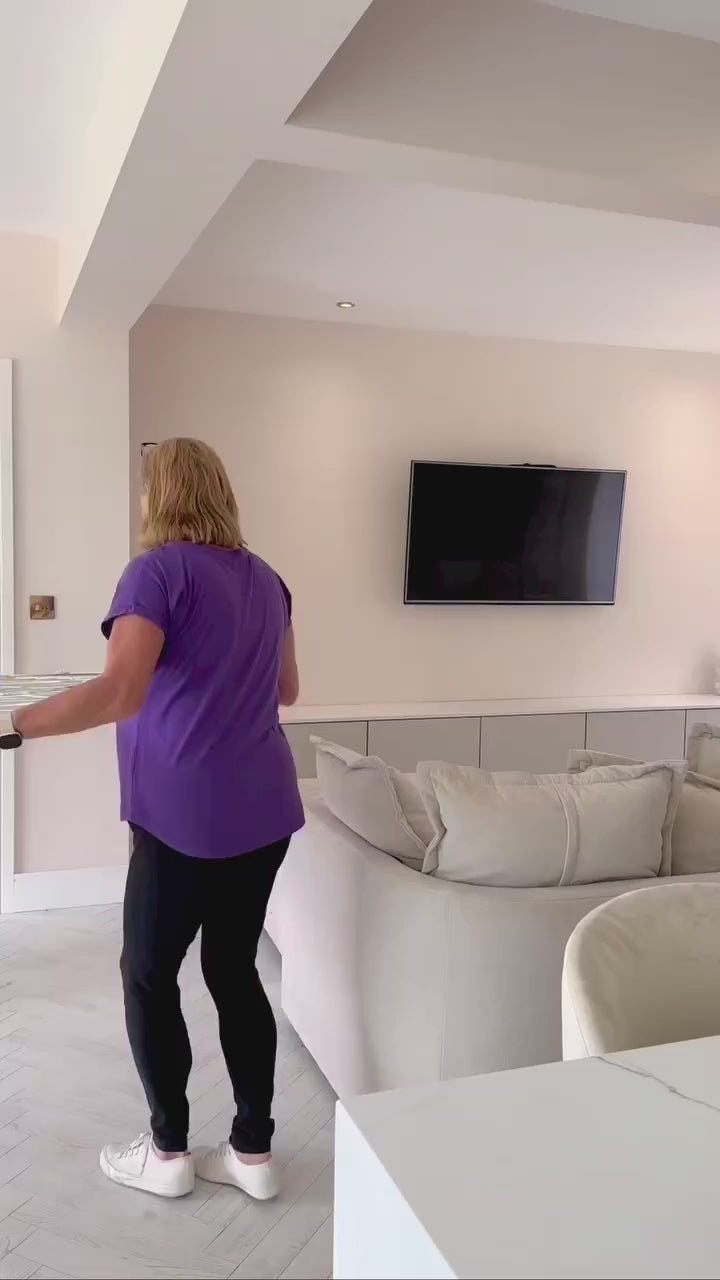
Our Fluted Wall Panels feature a timeless, flute design that adds dimension and a premium feel to your space. They are moisture-resistant and paintable, so are perfect for any room in your home or commercial space.
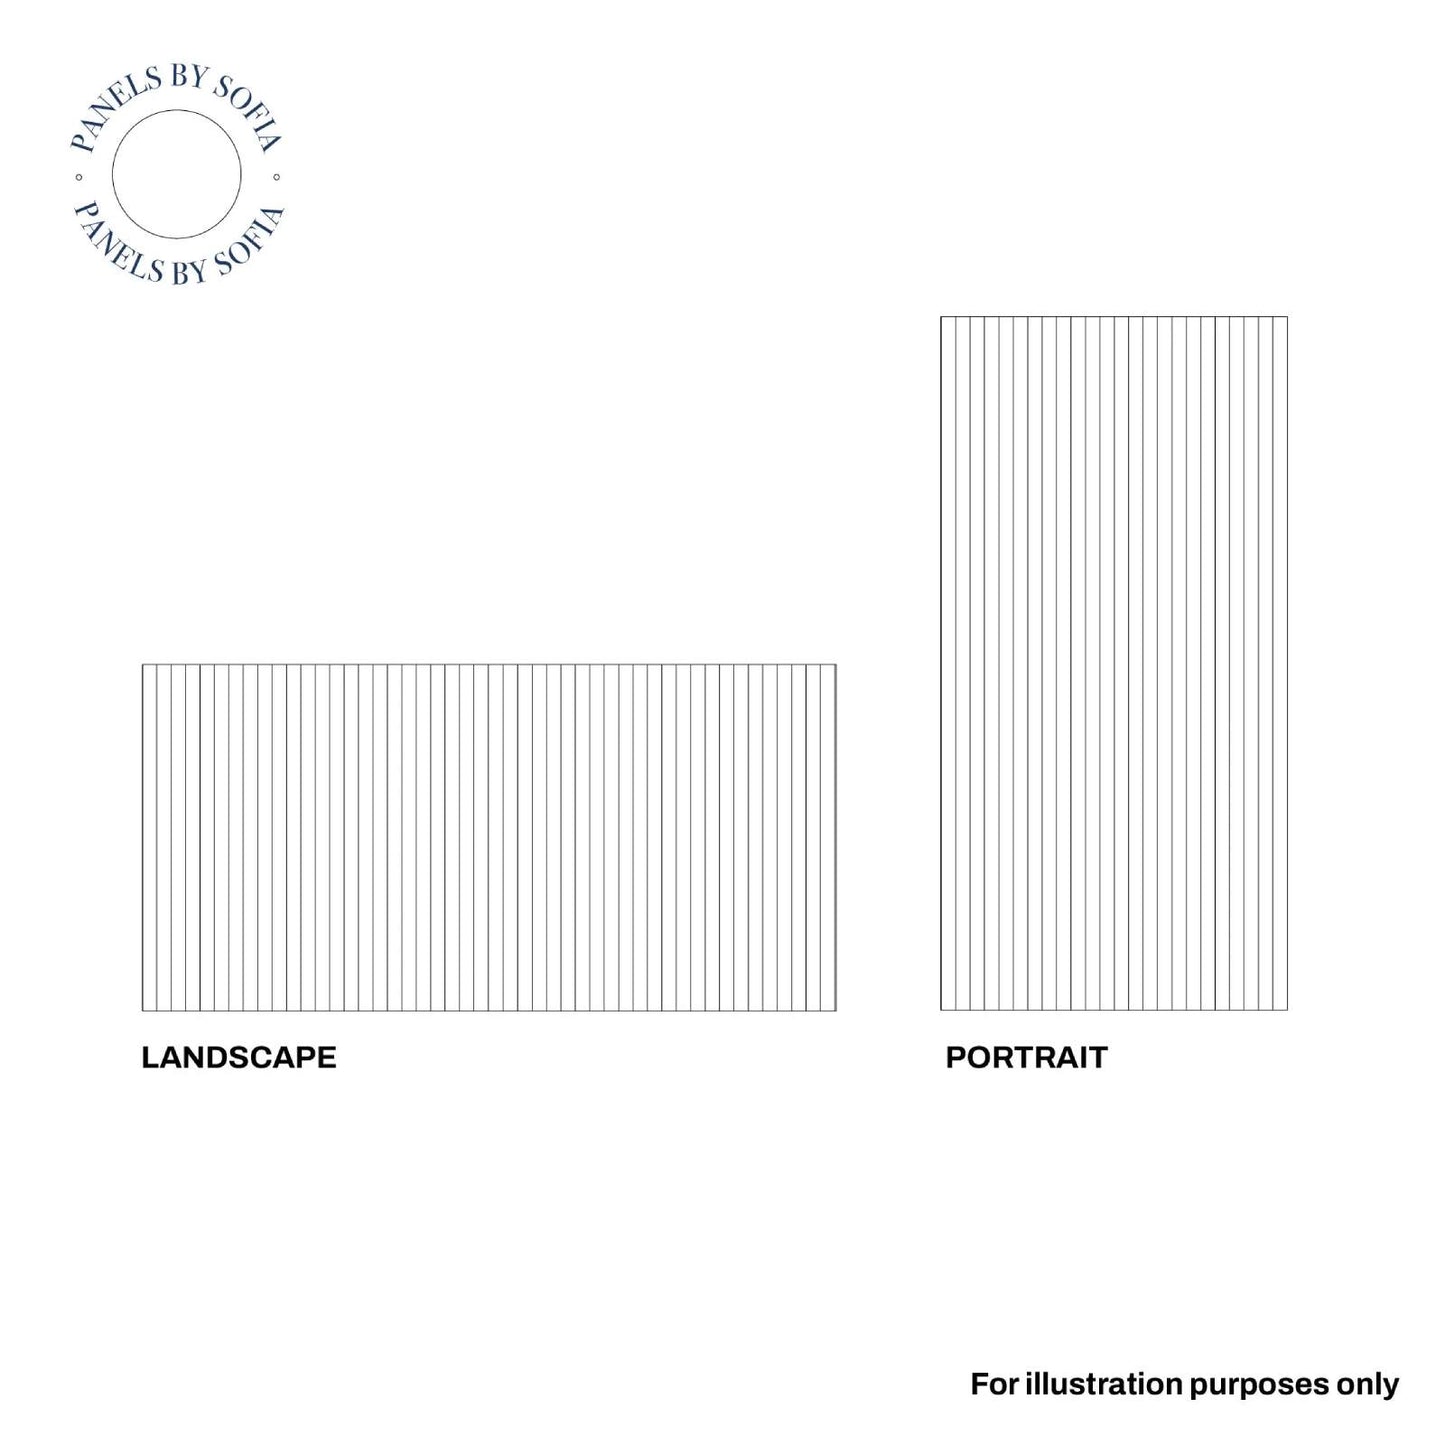
Select portrait orientation for taller wall panels or landscape for wider wall panels; the design will run vertically in either case.

Installation is easy - use our cut-to-size service for a bespoke fit, then simply prime, paint and secure the panelling with grab adhesive.
Not ready to commit yet? Order a Fluted Wall Sample.
Panelling a commercial space or near a heat source? Check out our Fire Rated Wall Panels for enhanced safety.
Great For:


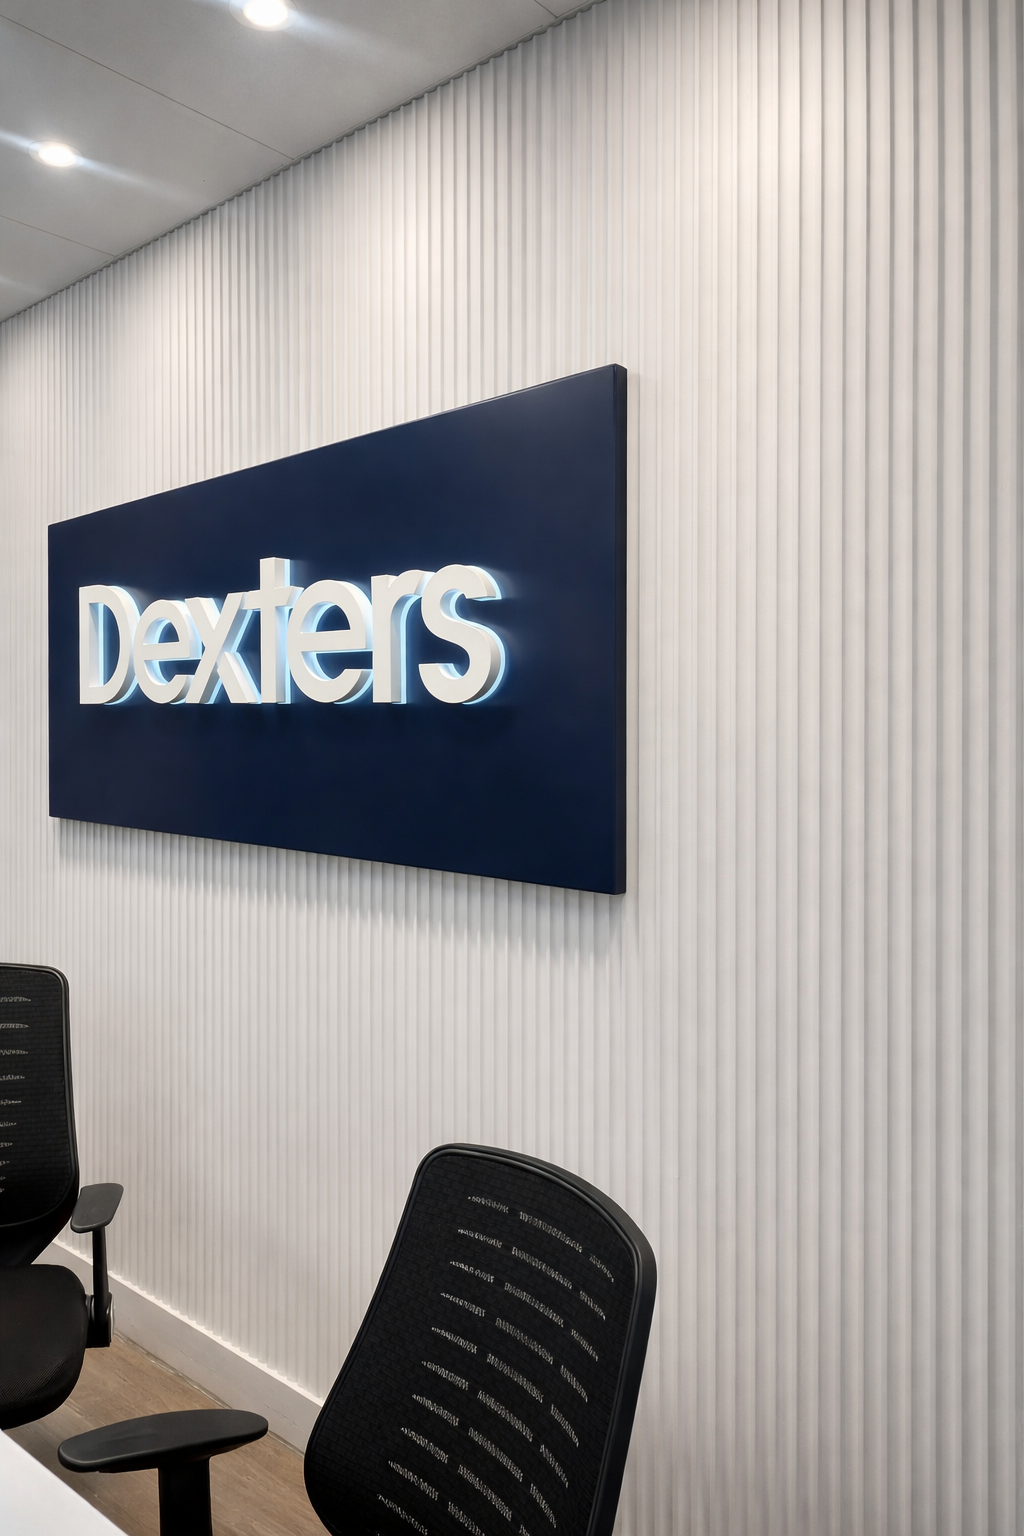


Featured In


